CareForIT provides three different options for building your rota. Here, we will look at the List view. To find detail on the other methods please click the following:
The 'List View' can be accessed via the Schedule tab under the Functions menu:
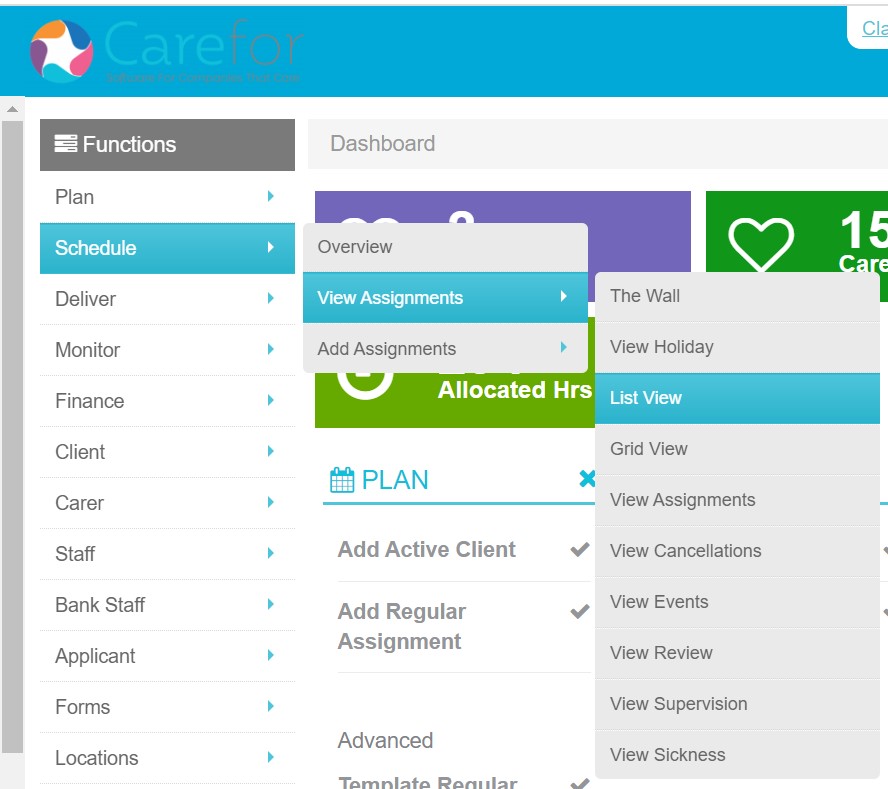
And also by clicking the Allocated Hours button on the main desktop:

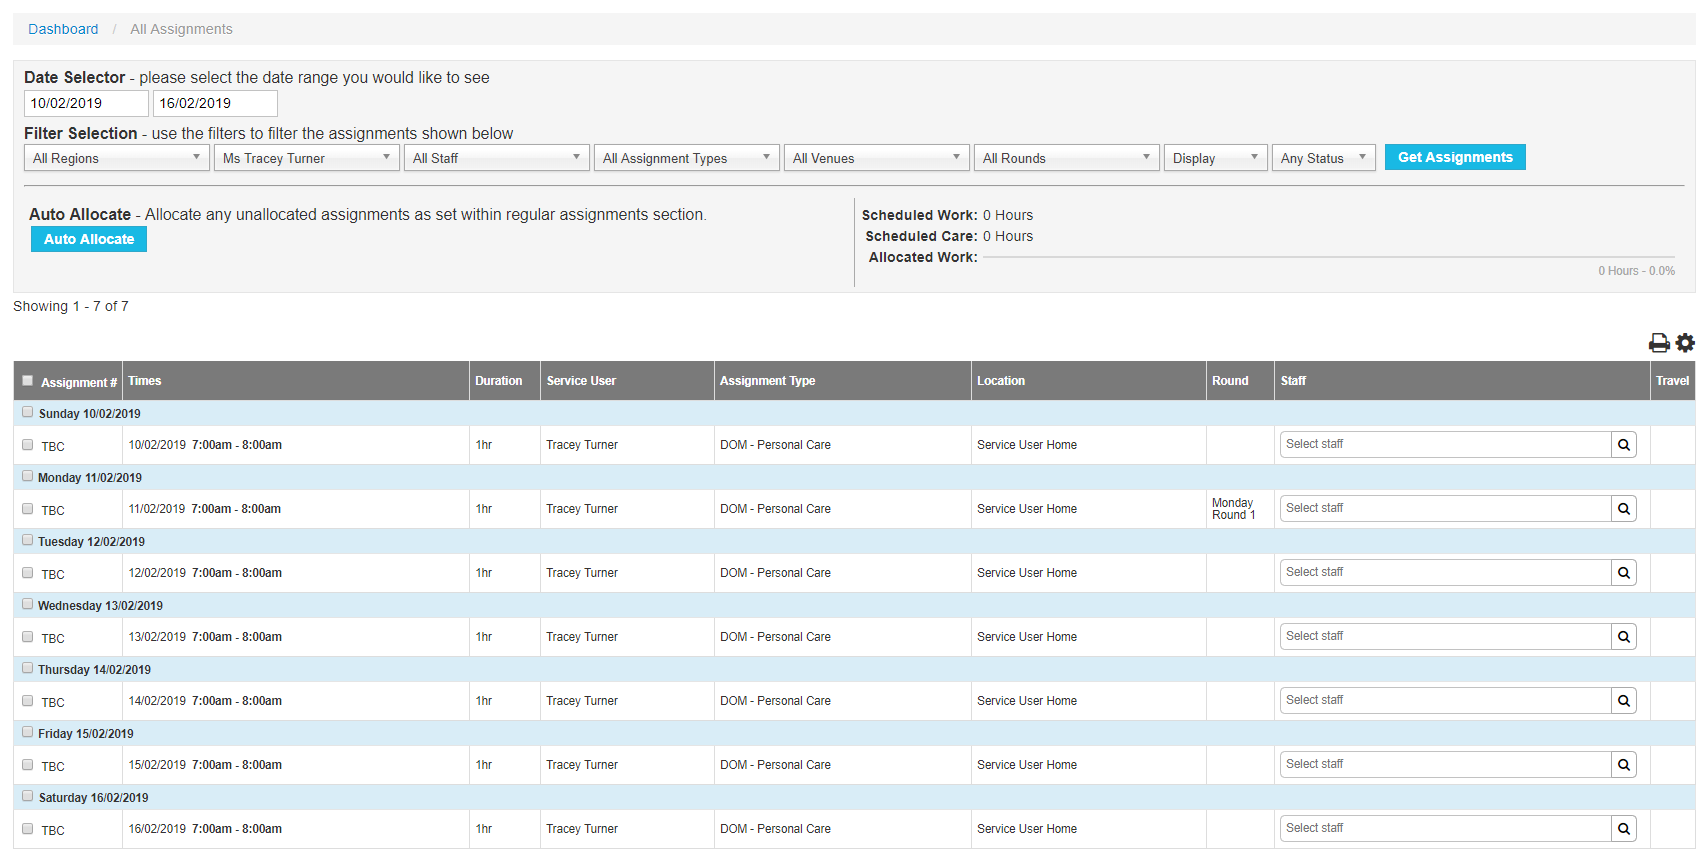
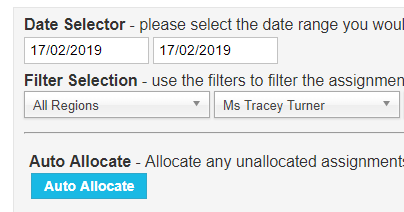
The list view allows you to filter your visits by a date range, and also by other criteria, such as regions and clients, to make it easier to build your rota:

Once you have selected the filters you would like to apply, click 'Get Assignments'. In the example below, you can see that a week and a client has been selected:
For the example shown above, it is possible to allocate all the filtered visits to one Carer. To do this you would click the small square above where it says 'Assignment #' in the header box:
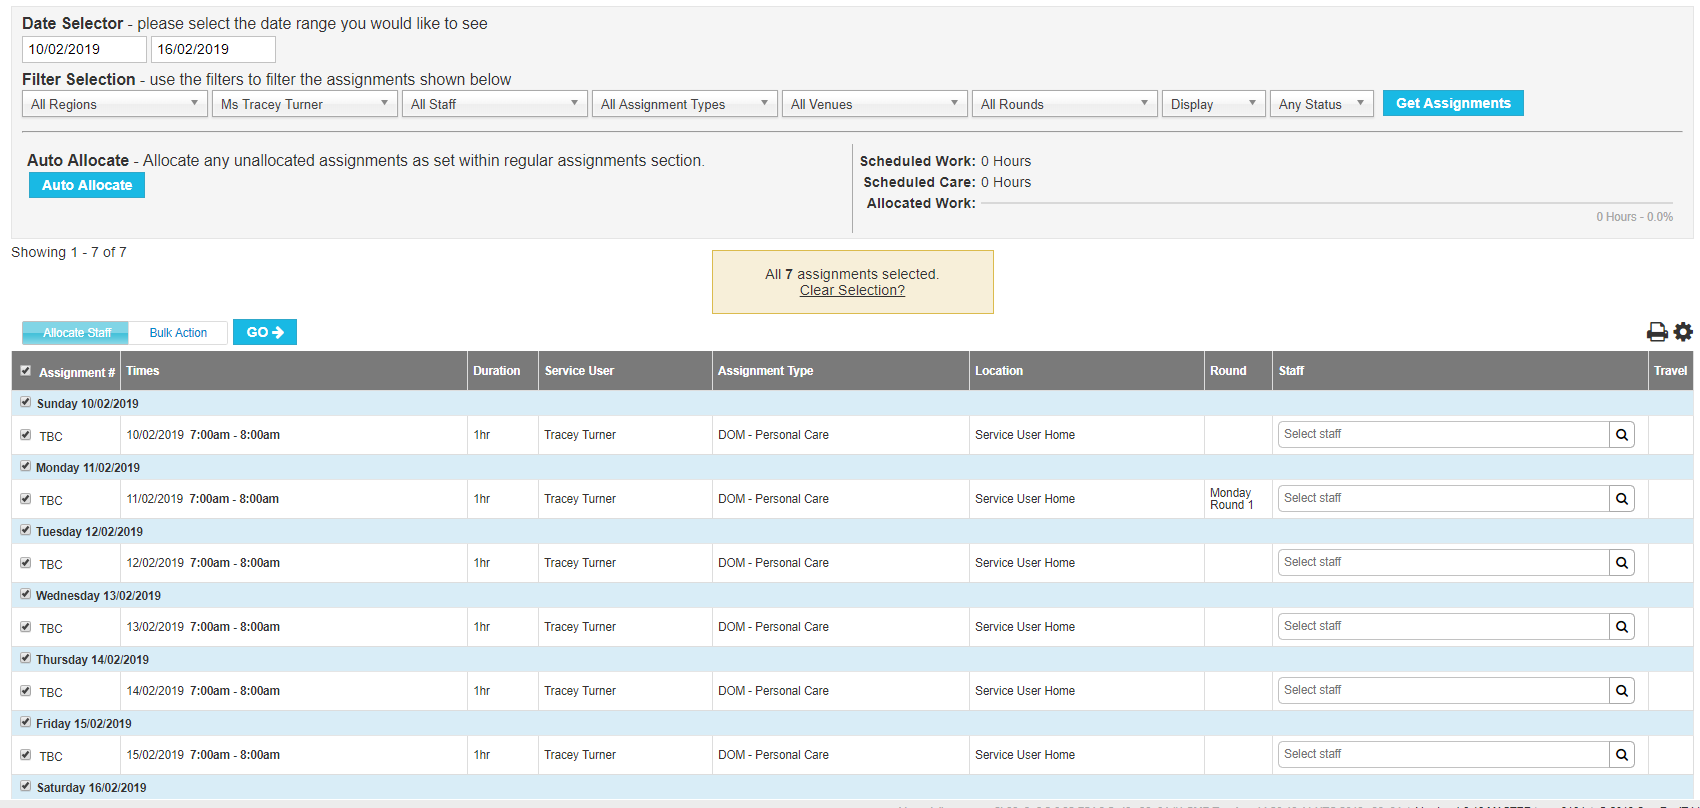
Putting multiple ticks in the 'Assignment #' column will present an 'Allocate Staff' option above the table, click 'Go' and CareForIT will find available members of staff to fulfil the selected Visits.
To allocate the Visits to the Carer, click their name and you will be presented with the following:
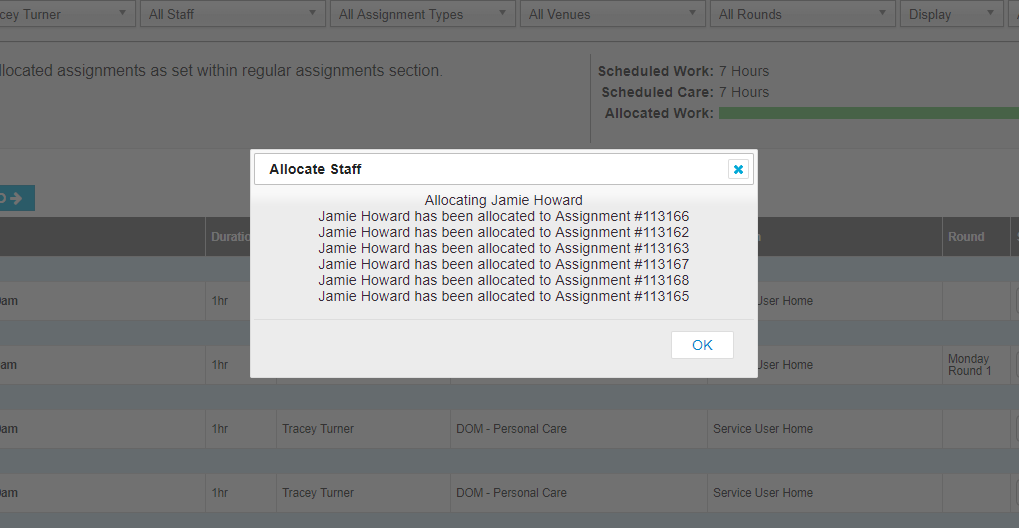
Clicking 'OK' will then return you to the List view, where you can see the Carer is now allocated to the visits:
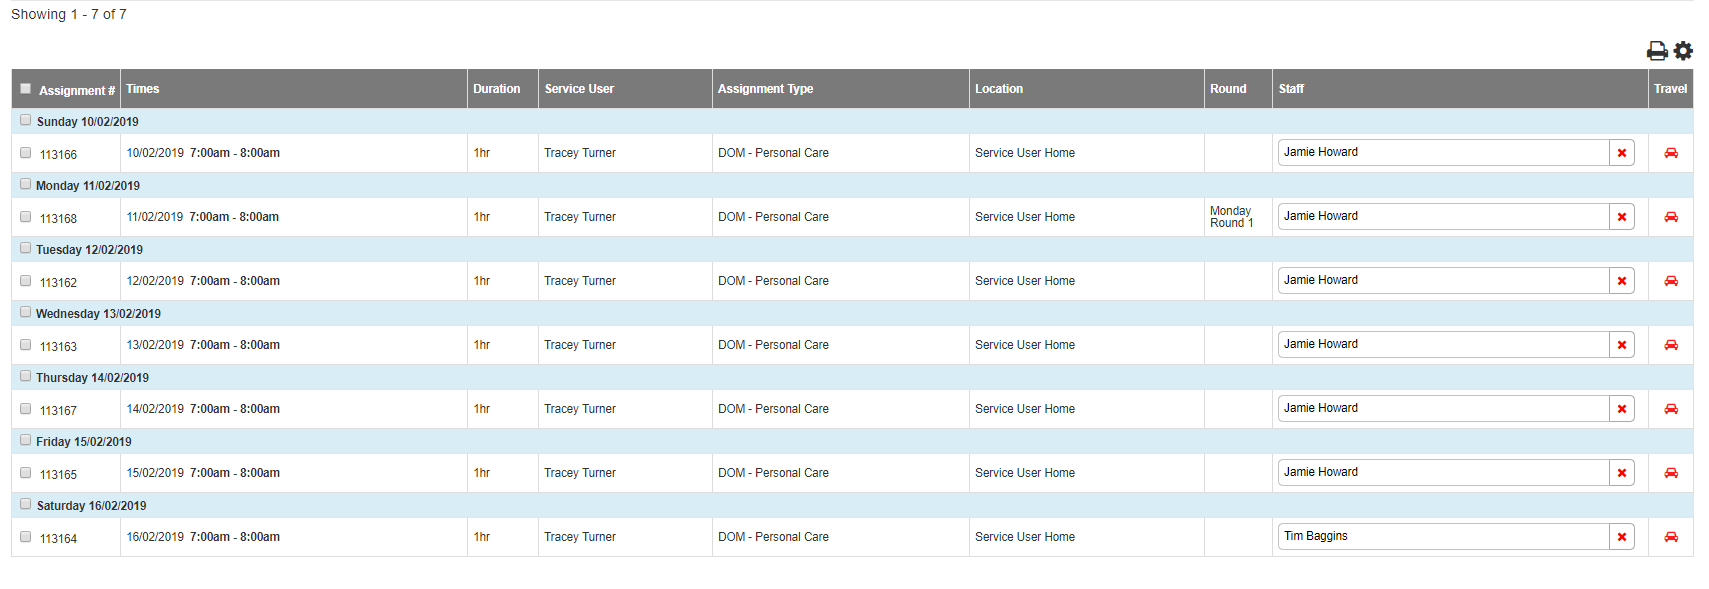
If you have added a Carer to a Visit in error, you can remove them using the 'X' in the red circle.
You can also use the magnifying glass option to allocate Carers to Visits.The magnifying glass is found to the right of a Visit if there is no Carer allocated to it. Simply click the magnifying glass, and you will be presented with a list of available carers who can fulfill that Visit:

The pop up displays useful information which can assist you in allocating. This is as follows:
- the distance (in miles) the Carer is from the Client
- how many recent visits the Carer has carried out for the Client
- how long it will take the Carer to get there
- amount of daily and weekly hours (if you have inputted target hours within the Carer profile, you will be shown how many hours out of their target weekly hours they have completed)
When you have chosen the Carer you wish to fulfil the Visit, click their name to allocate to them.
Auto Allocate/Copy Function
Within the List view, you also have further options found within the 'Auto Allocate' button. The 'Auto Allocate' button is found just under the filter selection:
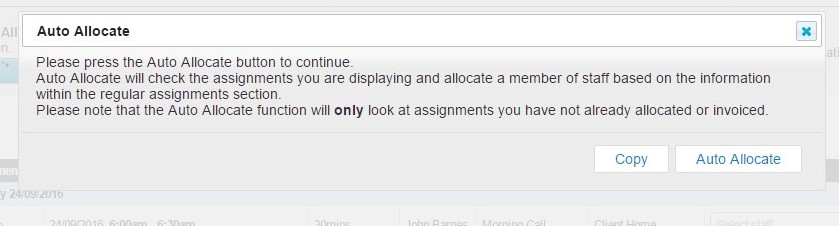
The 'Auto Allocate' screen provides two options, 'Copy' and 'Auto Allocate':
The 'Copy' function allows you to copy a previously created rota to the current week. You can copy a rota from up to four weeks ago. We advise you to copy your rota over day by day. Clicking the 'Copy' button allows you to choose when you want to copy from:
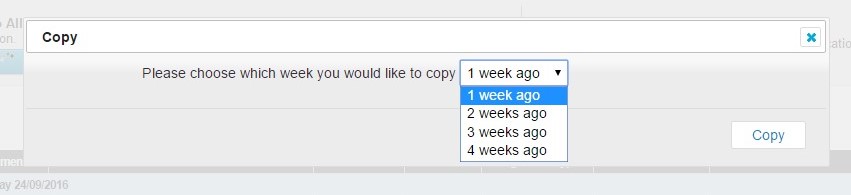
Once you have chosen your day, click 'Copy' and CareFor will copy the information across. You will be asked to confirm that you are happy and once you have confirmed, the copy is complete. You will need to complete this for each day in turn.
'Auto Allocate' looks at the information you have inputted on the ticks for each day in the 'Regular Assignments/Services' section of the Client's Care Plan:

When you click 'Auto Allocate' it will run through ,and using Carer availability plus the data on the ticks and create the rota for you. As with the 'Copy' option, you will be asked to check that you are happy with the rota before clicking 'Confirm'.
If 'no staff found' is showing for visits once auto allocate is run, this means that no regular staff have been added to that care plan, or they are unavailable.
Please note: Once you have completed your weekly rota, it is always beneficial to double check all slots have been filled. The easiest way to do this is to filter by 'Unallocated Visits'. This option is found in the 'All Staff' dropdown:
